


My 1/3-scale Fokker Triplane that I constructed from the Balsa USA package flies properly and has a powerful presence within the sky and on the flightline. If there’s something I’ve realized piloting this World Battle I tail-dragger, is that you could’t rush the landings. Lately, I acquired a bit excited on touchdown at a brand new flying subject, and I bounced the landing. Earlier than I knew it, my tire was operating down the runway, and I had a bent touchdown gear. That was the top of flying for that day!
Earlier than you pack up your dented hen, make sure to decide up each single piece of runway confetti and place all of the little bits and items in a bag for the journey dwelling. Again within the workshop, you’ll be able to clear up your mannequin and take away the touchdown gear. The subwing is made out of balsa and lightweight plywood, so the restore supplies you want are your typical assortment of sandpaper, primer, passion knife, and razor noticed. To piece the damaged components again collectively, I take advantage of Zap CA, 1-oz. fiberglass material, and automotive spot putty.
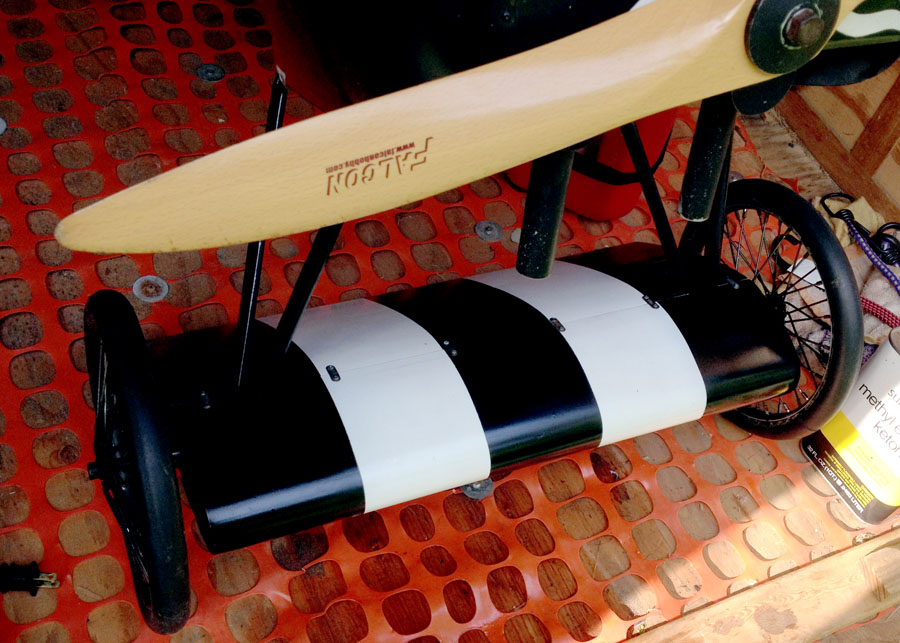
ONE:
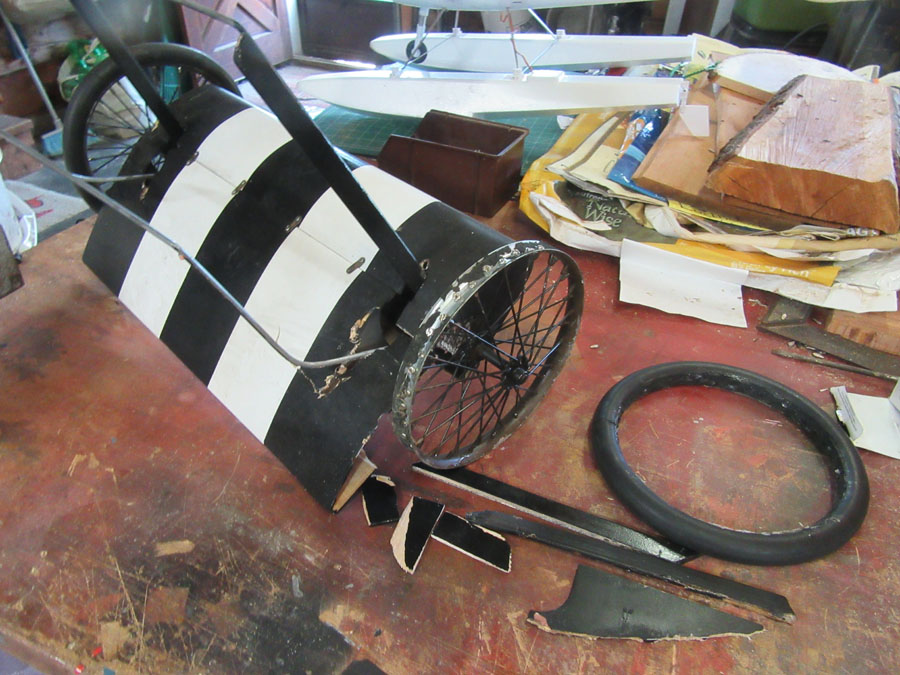
This isn’t a reasonably sight. You may see right here that the landing-gear struts (3/16-inch music wire) are fairly bent up and the subwing is damaged in a number of locations. The tire additionally peeled off the rim. So the very first thing to do is to take the whole lot aside and verify for different broken components.

TWO:
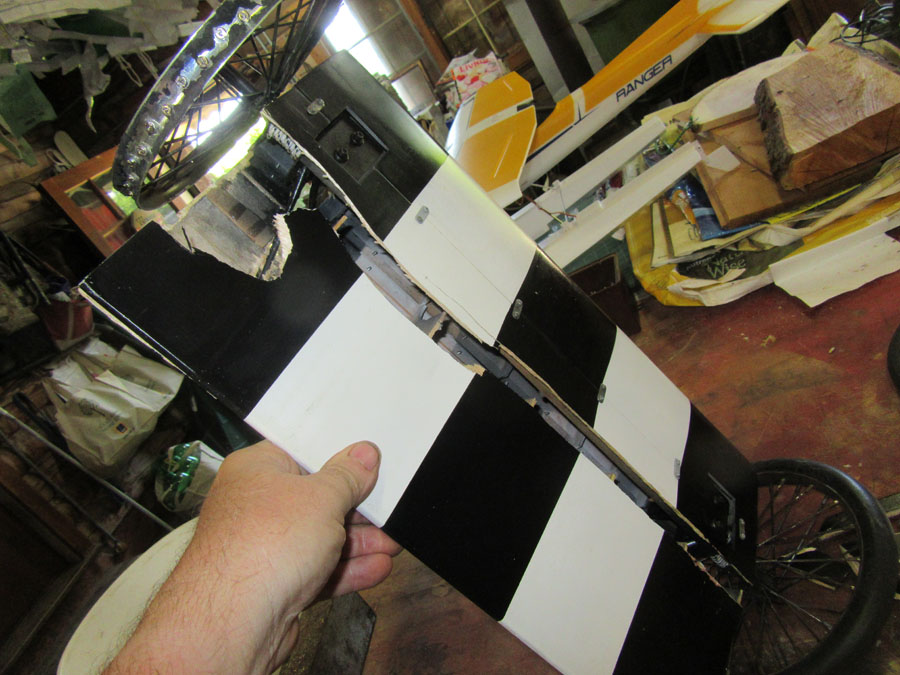
The aft part of the subwing was break up in two, so I eliminated the damaged components and unscrewed the ahead and rear sections in order that they might be separated from the gear.
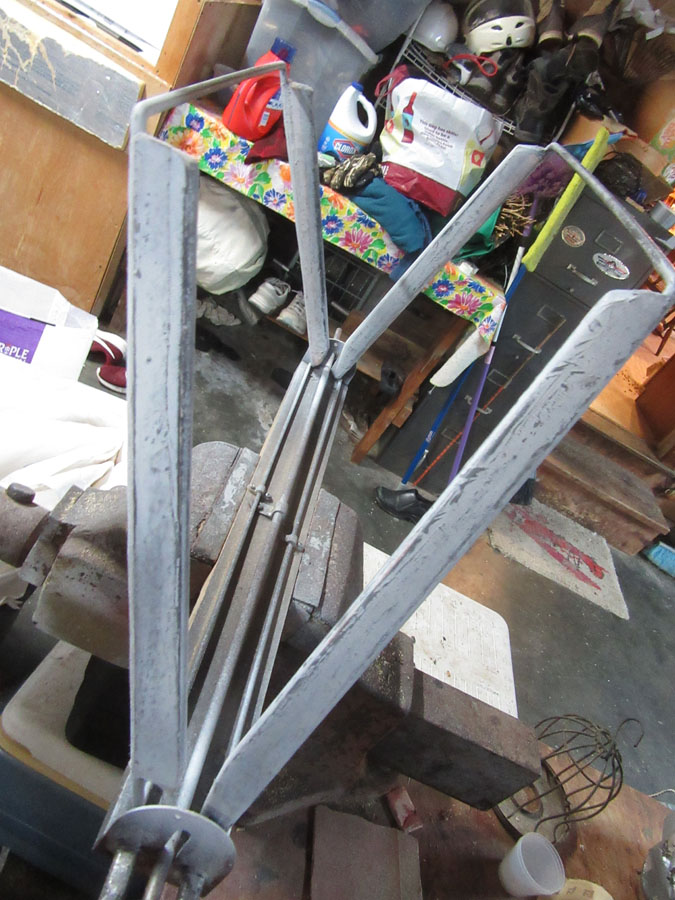
THREE:
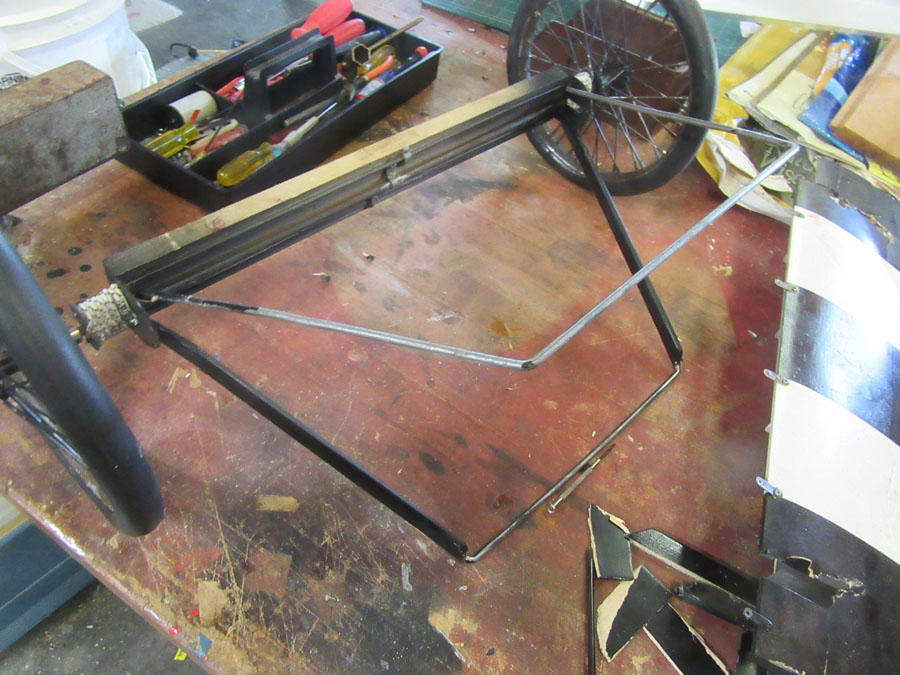
The wire struts are pretty straightforward to straighten utilizing a bench vise, a pair of vise grips, and perhaps a ball-peen hammer. Right here, you see the gear is nearly completely straightened with just a bit tweaking to do.
FOUR:
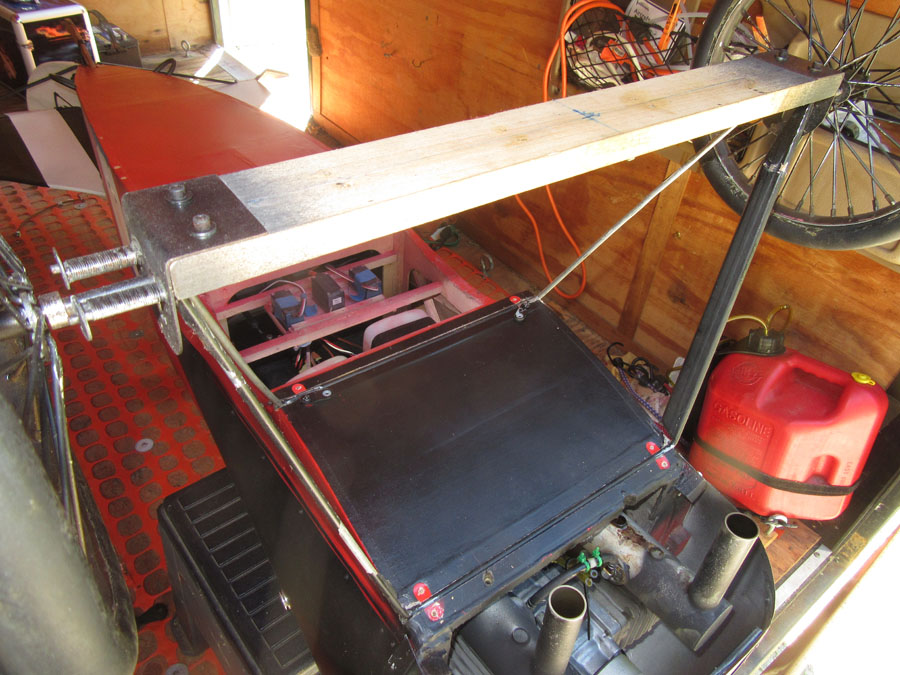
To verify the gear alignment, I reattached the touchdown gear to the fuselage (nonetheless within the trailer) after which took measurements between the axles and the tail submit. As soon as happy, it was again to the workshop.
FIVE:
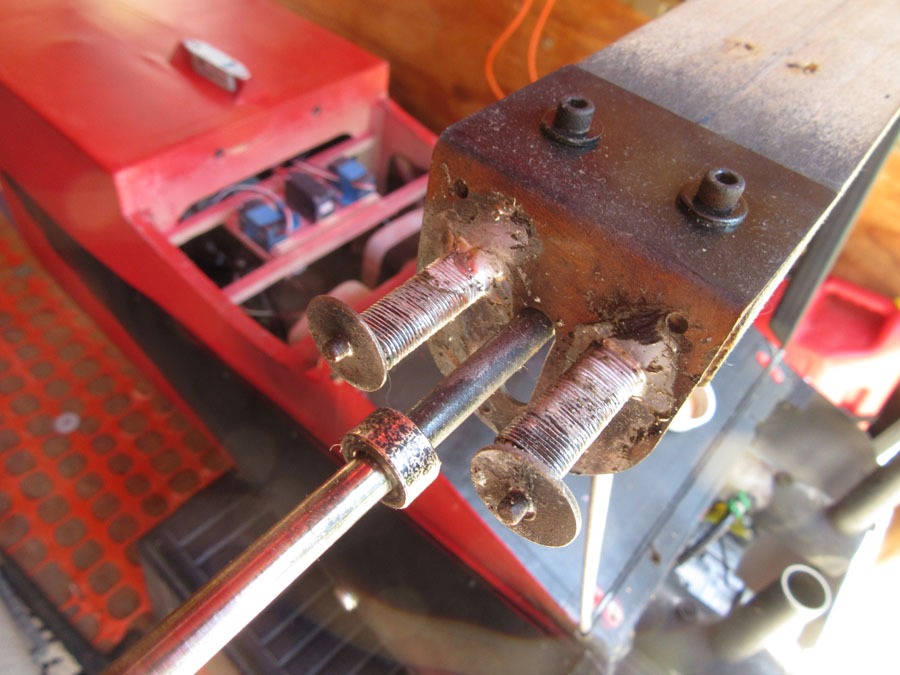
A more in-depth inspection additionally revealed some cracked solder joints for the bungee standoffs. After I cleaned it utilizing a wire brush and a few sandpaper, I resoldered the joints utilizing some Keep Brite flux and my 60-watt soldering iron. The high-silver-content solder flows simply into place.
SIX:
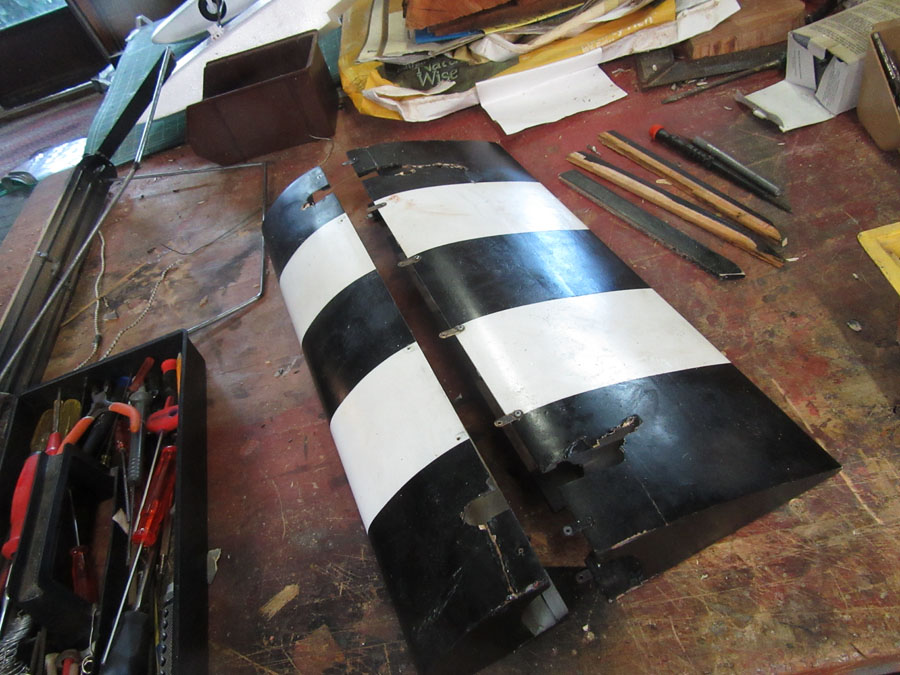
Again to the subwing fairing, I reevaluated the harm. Many of the damaged items have been usable, however some simply weren’t.
SEVEN:
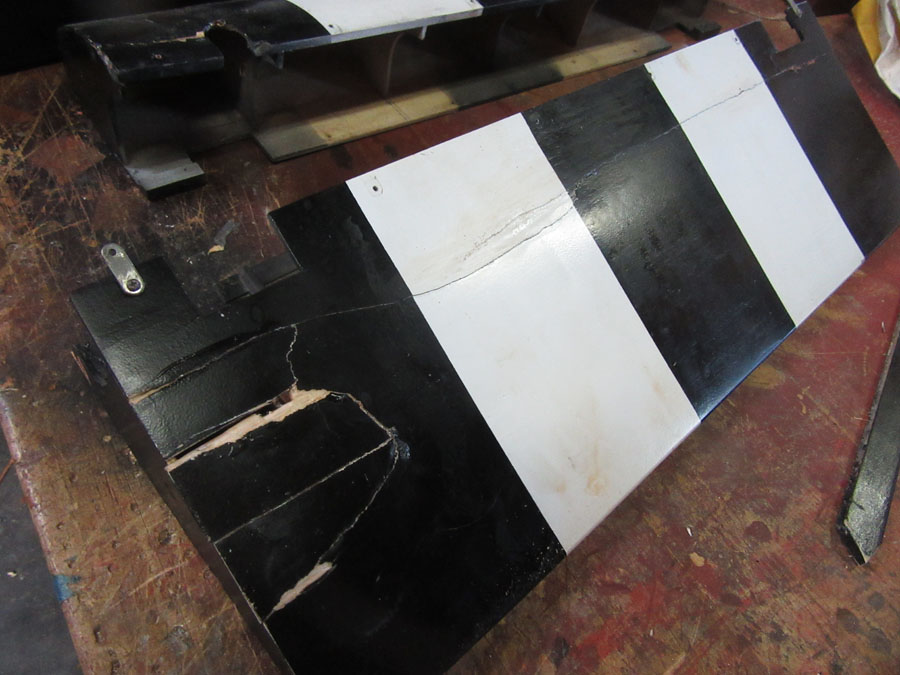
Right here, the underside floor has some items glued again into place. I used skinny Zap glue and thoroughly flowed it into the cracks to carry the components collectively. As soon as they have been in place, I added some swatches of fiberglass material to the within to strengthen the restore areas.
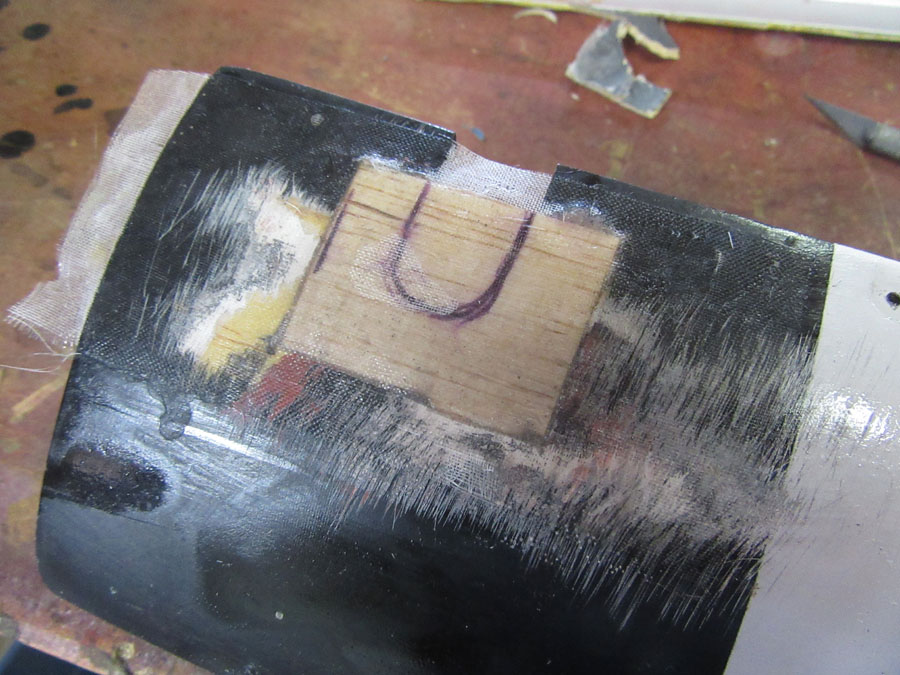
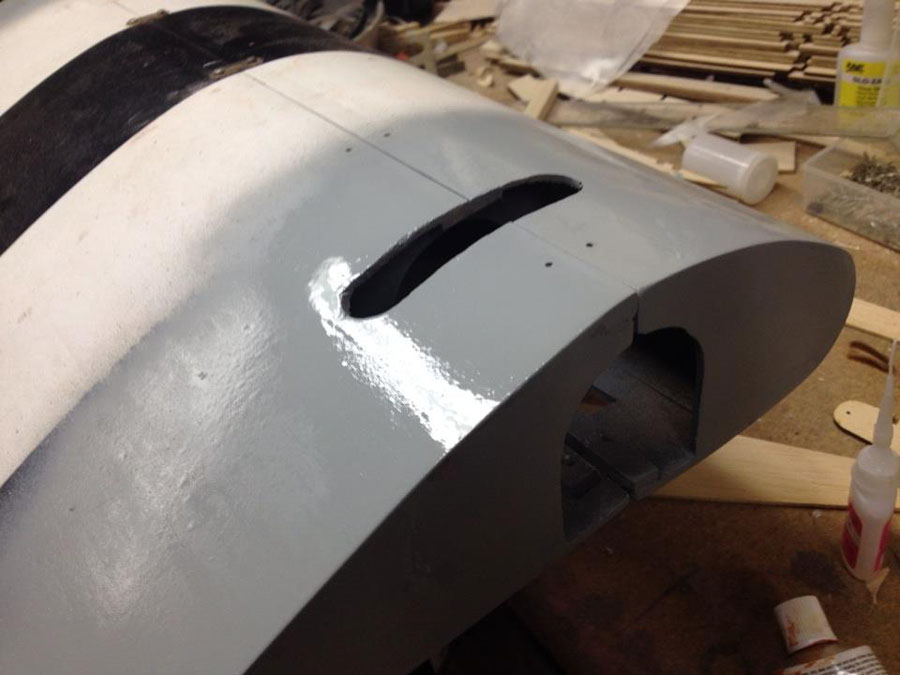
EIGHT:
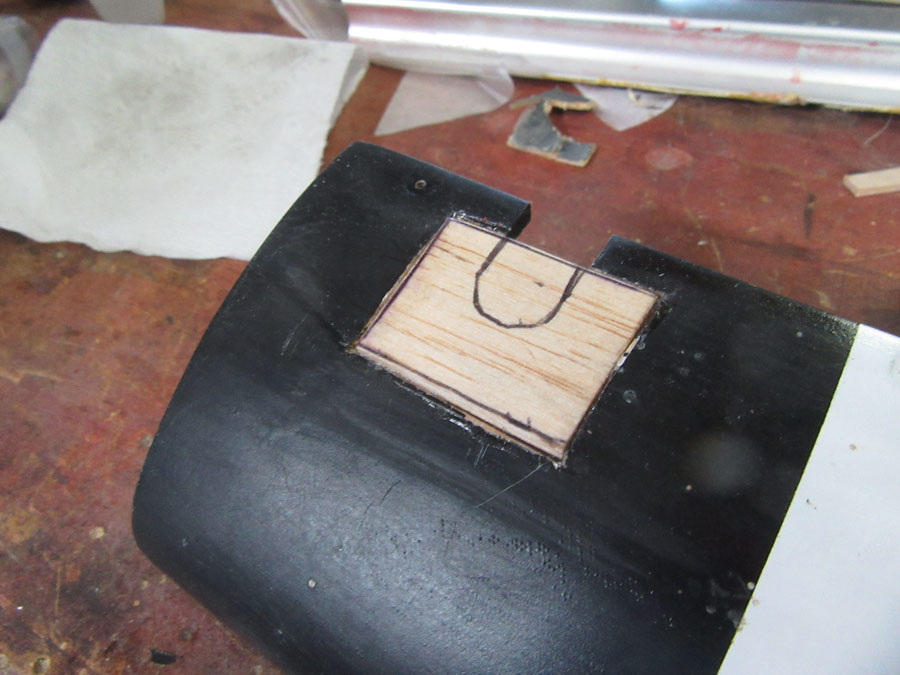
For areas that have been too badly broken to piece again collectively, I reduce away the harm and changed the sections with new 1/8-inch balsa sheeting. Right here, you see the balsa glued in place and a tenet to outline the location of the brand new gear-strut slot.
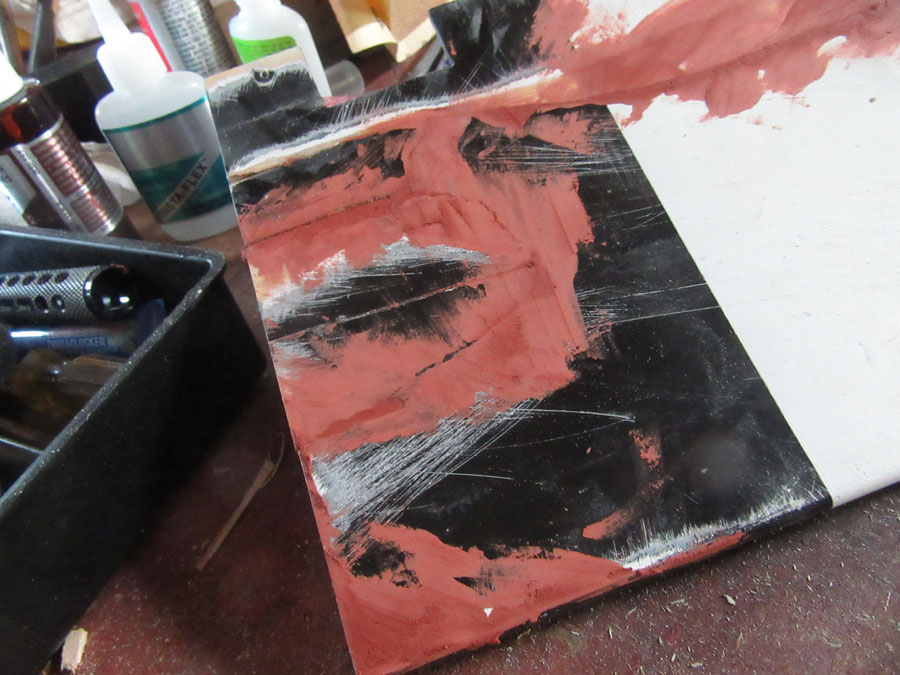
NINE:
With a bit sanding and a few spot putty to fill the cracks, this part was then lined with two layers of fiberglass material. Every layer was glued in place with cautious utility of skinny Zap glue. This goes shortly, and you’ll see white areas of the material’s weave the place extra glue is required.
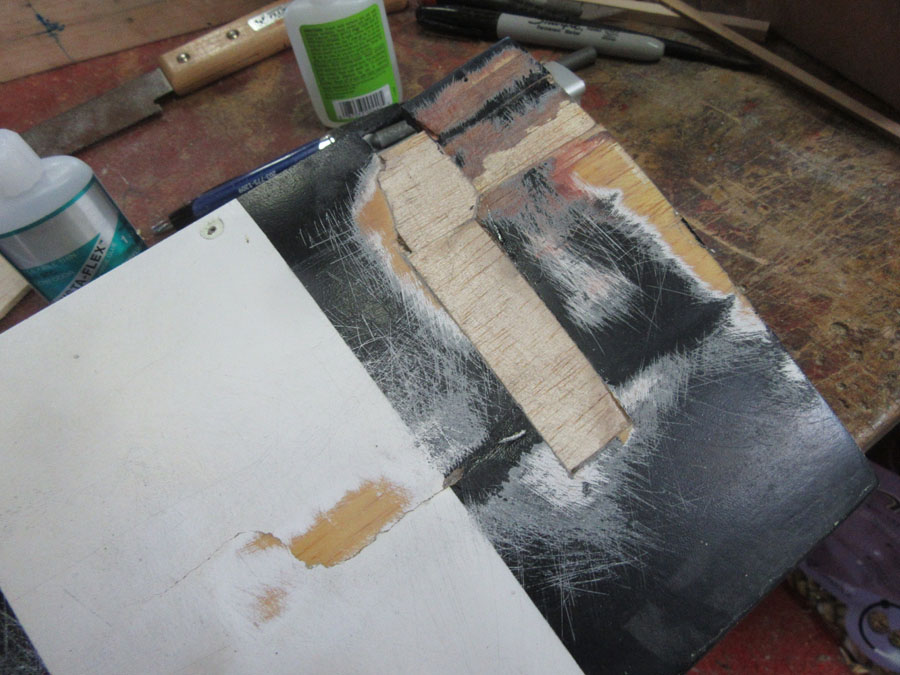
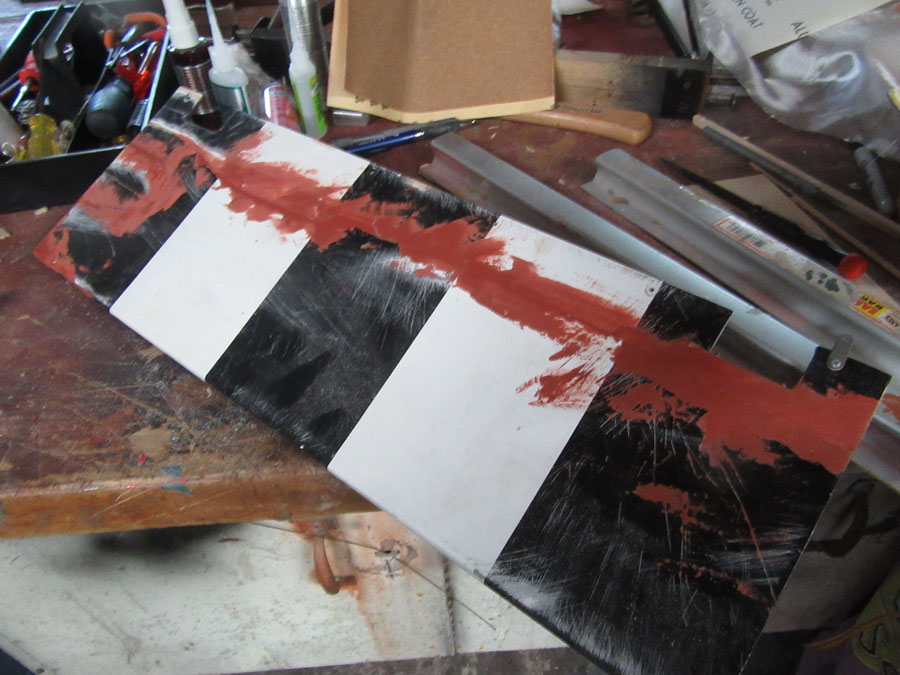
TEN:
On the alternative aspect, much more materials needed to be eliminated and changed with new balsa. Once more, the restore space is sanded clean, with some spot putty utilized to the cracks. All the pieces is sanded clean and flush with the remainder of the fairing.
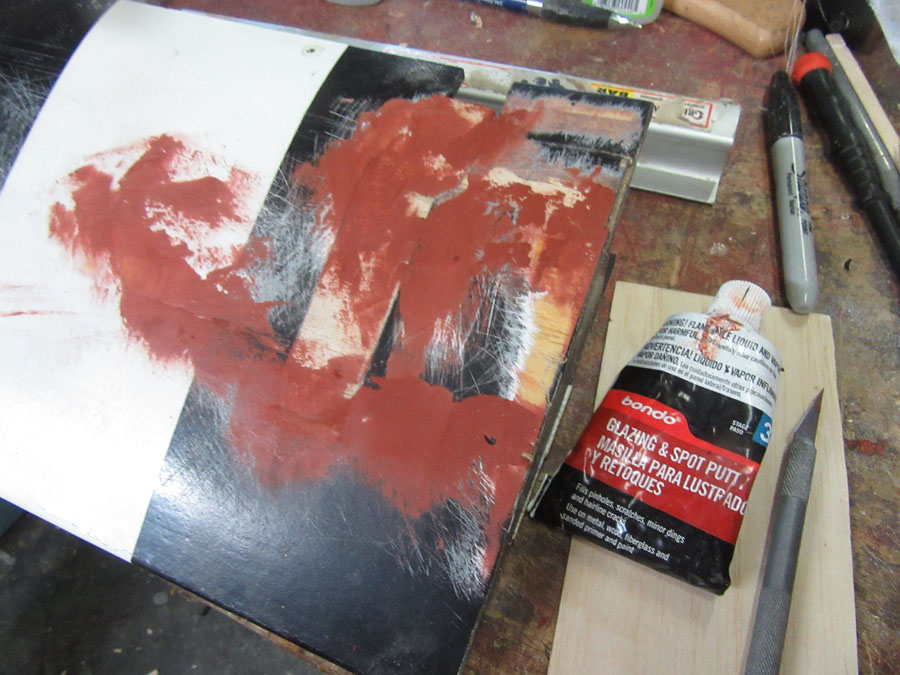
ELEVEN:
I utilized skinny coats of spot putty to the restore areas after which let it dry utterly earlier than sanding.
TWELVE:
Right here, the realm has been sanded clean; just some areas want a bit extra putty.
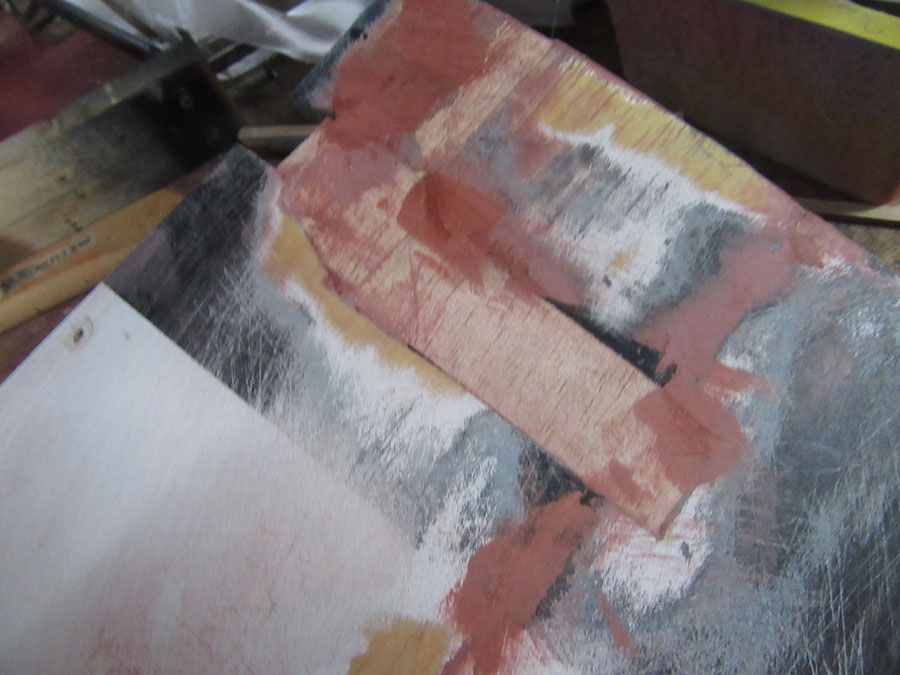
THIRTEEN:
On the underside of the fairing, the broken areas get the identical therapy of a number of coats of spot putty and sanding.
FOURTEEN:
Right here, the lengthy break line obtained extra putty and sanding till the broken space was constructed again up clean and flush once more.
FIFTEEN:
As soon as the repairs look good and clean, shoot on a lightweight coat of sanding primer (I take advantage of Krylon). Areas that want extra filling present up with tiny pinholes; these are, once more, handled with a skinny smear of putty and extra sanding.
SIXTEEN:
The restore space is all patched up, however the floor isn’t clean and even. Yep, extra putty and sanded is required.
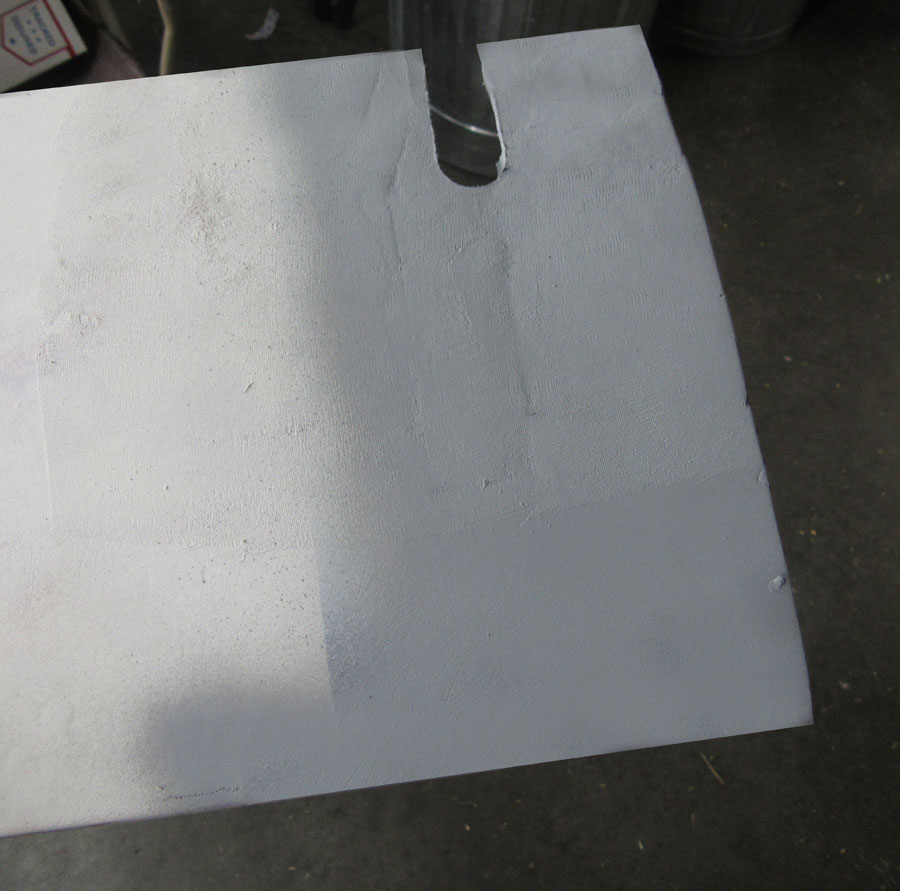

SEVENTEEN:
The realm is now good and clean, and a contemporary coat of primer exhibits that there’s little to no signal of the restore. The identical method was used with the opposite broken part till I had a clean and properly primed subwing. I let the primer dry for a day or two earlier than portray.
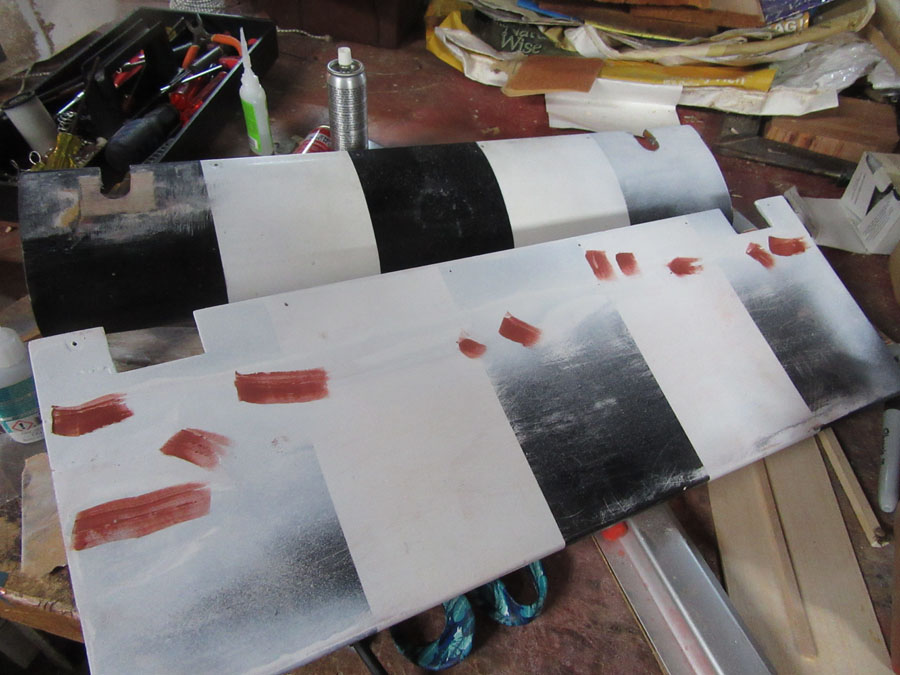
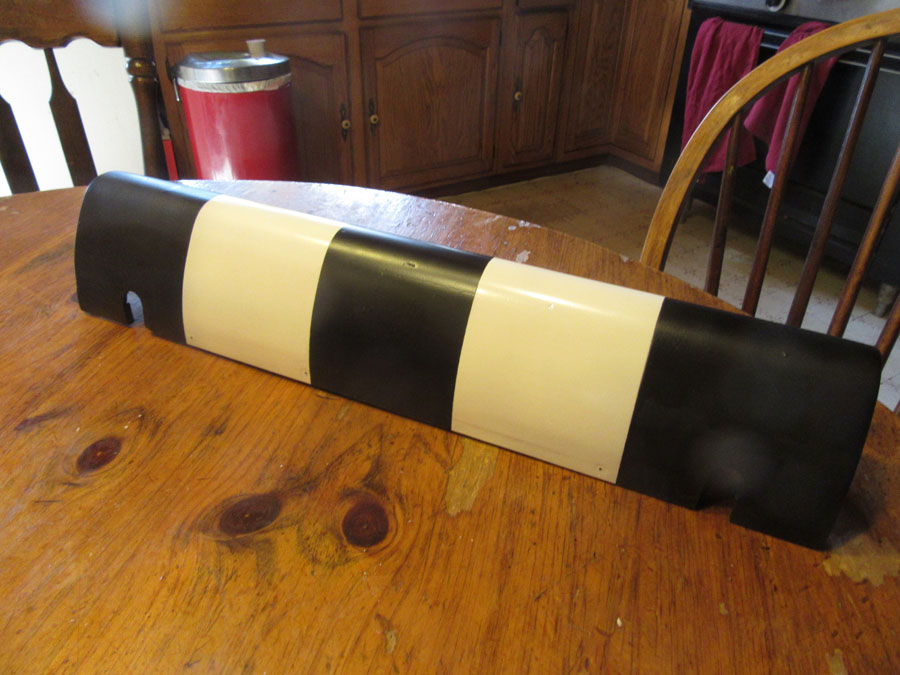
EIGHTEEN:
The remainder of the method is fairly simple. Apply the lighter-color paint first, let it dry, after which masks and apply the darker colour. I let freshly painted components dry in a dust-free space away from the workshop. Let every colour dry for a day earlier than making use of the subsequent colour. Then let the whole lot dry once more for a day or so earlier than making use of a protecting clearcoat. Three coats of clear does the trick.
NINETEEN:
With the painted components drying, I went again to the landing-gear struts and added new landing-gear-strut fairings. These are constructed from strips of basswood which have grooves reduce within the edges to simply accept the wire struts. I used 15-minute epoxy to attach them in place, then I wrapped them and the wire struts with a layer of fiberglass material. Right here, they’ve been primed and sanded. A few therapies with spot putty, adopted with extra sanding, and the gear will likely be prepared for portray and clearcoat.

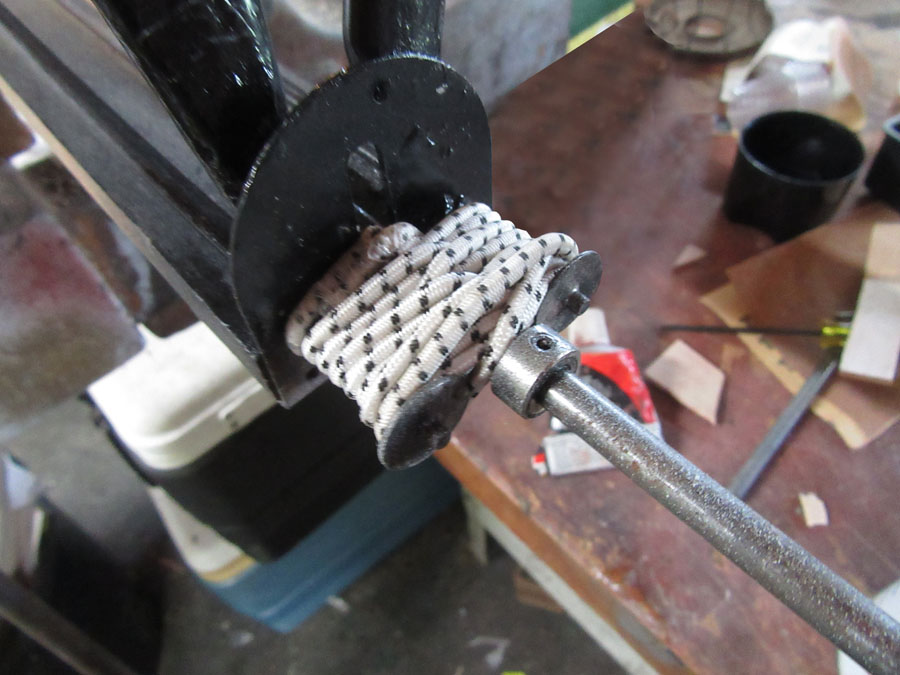
TWENTY:
Earlier than the subwing fairing will be reattached to the touchdown gear, I needed to reduce new bungee cords to size, bind them collectively to kind a loop, then wrap them across the standoffs and over the axles.
TWENTY ONE:
Again on the flying subject, the freshly repaired touchdown gear helps the triplane as soon as once more. A bit of extra silicone adhesive has been utilized to the unfastened tire, and it’s again in place across the wheel’s rim. In all, this restore took a few days unfold over two weekends to finish.

Backside Line
In order that’s it: one other landing-gear restore made and the triplane is once more airworthy. I’m getting good at some of these restore; I simply have to do higher within the touchdown sample! So don’t really feel down should you harm your plane. It’s all a part of the passion, and as they are saying, “What doesn’t kill you (or your mannequin) makes you stronger!”
Textual content & images by Gerry Yarrish


